Procedural Technique for OrthoATITM
Introduction
Orthocell’s OrthoATITM intervention uses a highly advanced approach that uses each patient’s own tenocyte cells to stimulate the formation of collagen and other connective tissue elements. OrthoATITM enables the accelerated healing of tendinopathies which are resistant to other existing therapies. OrthoATITM reduces pain and stiffness and increases strength, thereby greatly improving the patient’s quality of life.
Patient Selection 1.
OrthoATITM is indicated for:
- Patients with tendinopathy caused by repetitive trauma, with or without partial tendon tear.
- Patients with symptoms of degenerative tendon injury. Symptoms include pain on usage/motion, which is often exacerbated by exercise or prolonged usage.
- Patients with tendinopathy or symptoms of degenerative tendon injury who have failed to respond to conservative treatment therapies such as physiotherapy and corticosteroid injection.
- OrthoATITM is indicated pre surgery, or as an adjunct to surgery.
OrthoATITM NOT recommended for:
- Patients with acute tendon injuries.
- Patients with full thickness tendon tear.
Equipment
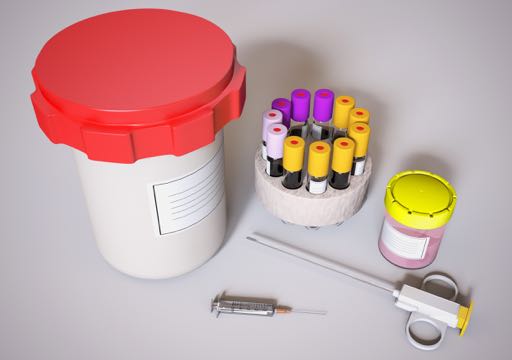 Biopsy kit
 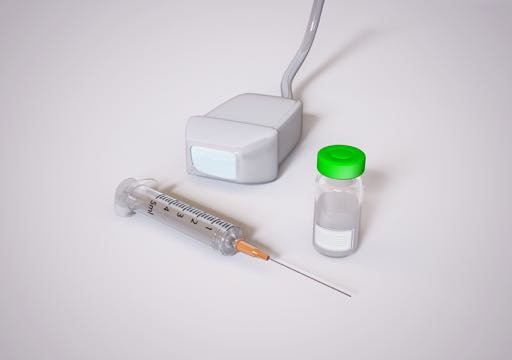 Implant kit
 OrthoATITM First Procedure 2.
OrthoATITM Biopsy
The tendon biopsy is taken predominantly from the patella tendon or quadriceps tendon in an out patient scenario, and the patient is able to go home following the procedure.
Patient Positioning
- Patella or Quadriceps – Patient is seated supine with knee raised (bent to 45 degrees) and foot on bed.
ATI Biopsy Procedure
- Prepare and clean the treatment area using povidone iodine or a similar solution.
- Ultrasound the tendon to be biopsied to ensure it is free of tendinopathy and to obtain the relevant landmarks.
- Inject a long-term (>2 hours) local anaesthetic into the skin and subcutaneous tissue (superficial to the tendon).
- A small incision may be required for easy passage of the trocar cannula.
- It is recommended to use a cannula with the biopsy needle as this allows the needle to fire more easily and limits the risk of contamination from the skin flora.
- Please refer to 10-IFU-11 OrthoATITM Product Information for further details.
- Please refer to 10-IFU- 01 OrthoATITM Receipt of Biopsy Pack and 10-IFU-02 Use of Biopsy Pack.
Biopsy Collection
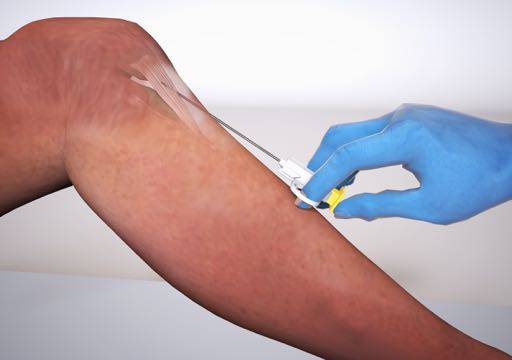
Step 1
- Load the biopsy needle prior to inserting into the cannula.
- Once a small incision is made, the trocar and cannular is passed through the subcutaneous tissue. Remove the trocar and insert the needle to rest on the sheath of the tendon (to the point of resistance).


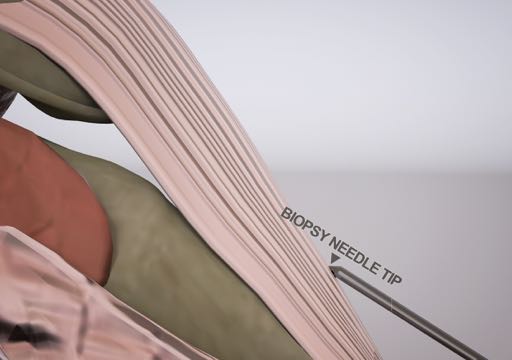
Step 2
- Using your thumb, engage the needle by sliding the biopsy needle (internal bevel) shearing point into the tendon, confirming with ultrasound that the needle is seated within the tendon structure.
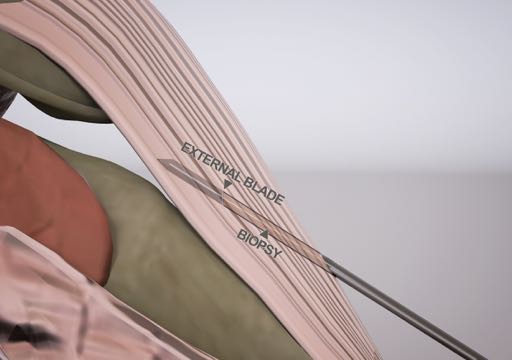
Step 3
- Fire the needle in order to take the biopsy (external blade will shear a tendon sample).
- Withdraw the needle from the tendon (leaving the cannula in place).
- Using a sterile technique, and with the help of a sterile hypodermic needle, place the biopsy into the transport media.
- Be careful not to expose the media to contamination by ensuring aseptic handling procedures.
Biopsy Sample Collection
- You may need a hypodermic needle to remove the tendon from the biopsy needle. Replace the lid over the transport medium between biopsies.
- Repeat the collection so you have at least two good slithers of tendon.
- When done, replace the lid securely without cross threading.
- IMPORTANT – label the transport media with patient details, as specimens that are not labeled will not be accepted.
- N.B – Stylised image, biopsies vary in appearance.
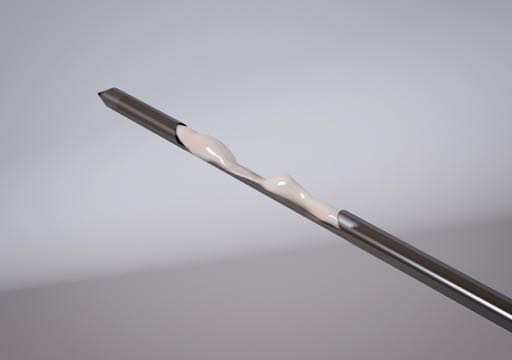 Biopsy sample as seen with external blade retracted
 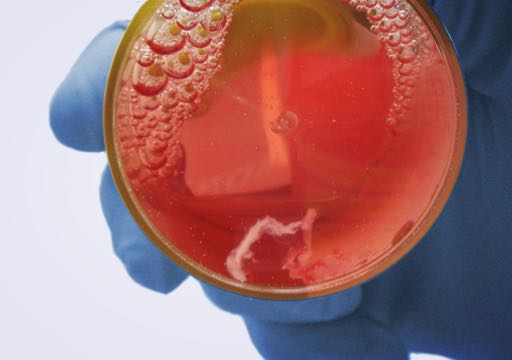 Biopsy within transport medium
 Blood Sample Collection
- Collection of blood is done at the time of biopsy.
- Fill each of the blood tubes starting with the pearl and purple-topped tubes.
- All tubes are to be filled and labelled with the patient’s details. Unidentified samples Will Be Discarded.
Packing
- Place the biopsy and blood vials in foam supports.
- Place samples in the plastic bag.
- Seal with provided tamper evident label (red).
- Detach the numbered tab from the red label and attach to the Biopsy Delivery Form (51-PM-05) or record the label number.
- Place bagged samples into the Transport Container and close.
- Follow Enclosed Instructions for Packing Box and call courier.
Important notes for Biopsy:
- On receiving biopsy kit, place transport container in fridge and ice packs in freezer.
- Ultrasound – recommended but not a necessity for biopsy procedure.
- 14 gauge Trucut biopsy needle required for tendon biopsy.
- All documentation must be completed and signed by patient and doctor.
- Refer to usage and packing instructions within the biopsy kit (10-IFU-01 & 10-IFU-02).
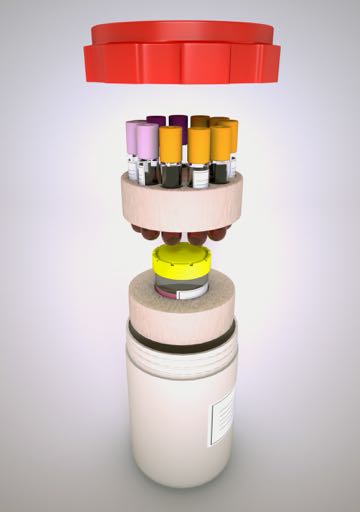 Biopsy kit packing
 OrthoATITM Second Stage – Implantation 3.
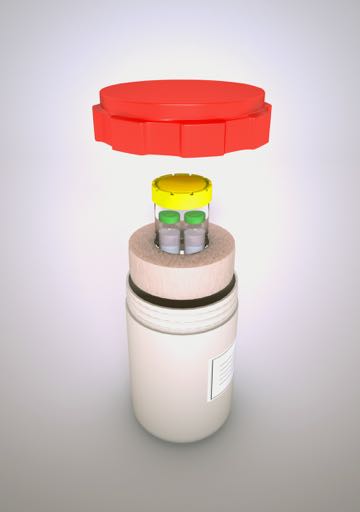 Implant kit
 OrthoATITM Implantation
The tenocyte cells are injected directly into the hypoechoic /degenerate area of the tendon with the aid of ultrasound.
This is to ensure correct placement of OrthoATI™ into the degenerate area of the tendon.
Preparation for OrthoATITM Implant
- Do not refrigerate the implant kit, open the kit when ready for use.
- Ultrasound the tendon you are going to implant to identify the hypoechoic/degenerate area of the tendon as well as all relevant landmarks.
- Prepare and clean the treatment area using povidone iodine or a similar solution.
- Inject a long-term (>2 hours) local anaesthetic into the skin and subcutaneous tissue (superficial to the tendon).
- Please refer to 10-IFU-04 OrthoATITM Receipt and Use of Tenocyte Implant Pack.
Implantation Process
- The cells will have settled in the bottom of the vial during transport and must be re-suspended prior to use.
- Invert the vial(s) gently several times without creating bubbles until you have a uniform suspension.
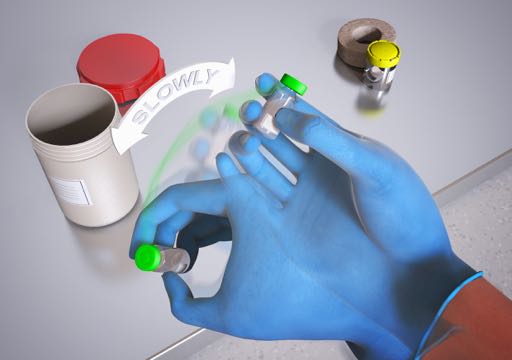 Re-suspending cells
 Drawing Cells
- Remove the centre aluminium tab from the green crimp seal and wipe with an alcohol swab.
- Use a 19 gauge needle with a 3ml syringe to gently draw up the cell suspension.
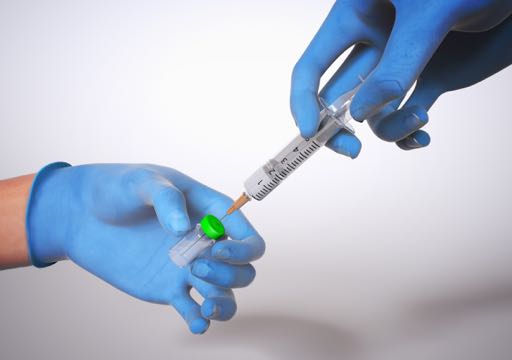
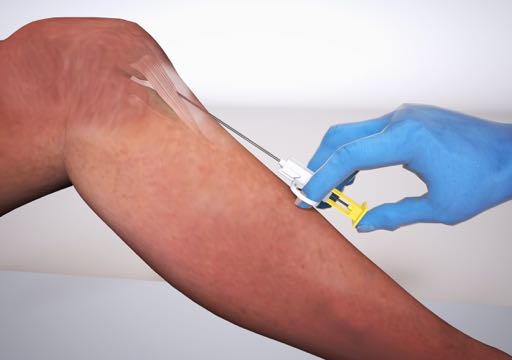
Tenocyte Implantation
- Cells are injected into the hypoechoic /degenerate area of the tendon with the aid of ultrasound guidance.
- This is to ensure correct placement of the OrthoATITM cells into the degenerate area of the tendon.
- Do not conduct any dry needling prior to implanting the cells.
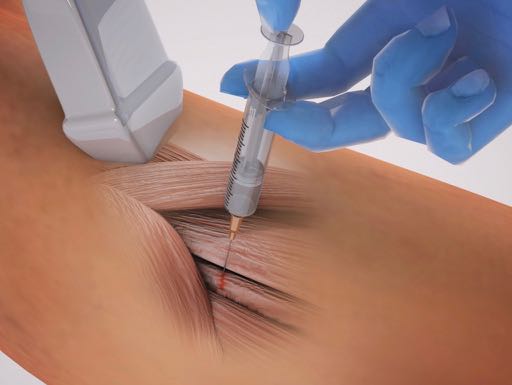 Ultrasound guided tenocyte injection
 Important notes for Implant:
- The implant kit expiry is 72 hours from time of shipping.
- Do not refrigerate, keep box sealed until time of procedure.
- The transport container holds up to four 1ml vials containing tenocyte cells.
- Each 1ml vial contains up to 5,000,000 cells.
Special Notes
- Physical activity should be resumed according to the prescribed rehabilitation program recommended by the treating physician.
- Please note that use of anti-inflammatory medications such as ibuprofen is not recommended for a period of 48 to 72 hours, as they may compromise your treatment.